
July 29, 2012
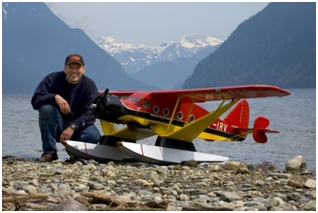 |
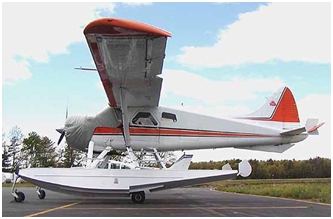
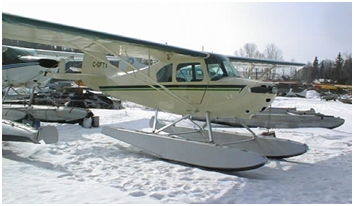
Floatplanes are converted wheeled aircraft that are equipped with floats (pontoons) that hold the aircraft fuselage well above the surface of the water. |
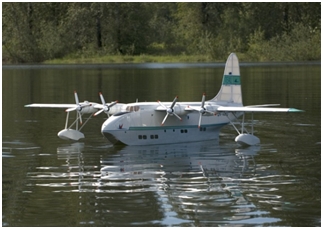 |
or flying boats, that have a boat-like hull that rests in the water. Most flying boats have wing tip or mid wing floats which help stabilize the aircraft when it is in rolling water (waves). |
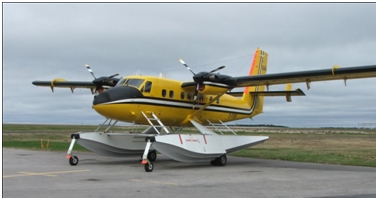 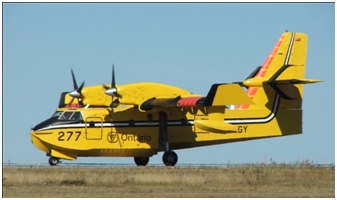 |
Amphibians are flying boats or floatplanes equipped with retractable wheels for landing on dry land. |
FLYING BOATSThe advantages of a flying boat design over the float equipped aircraft are:
|
|
FLOAT EQUIPPED AIRCRAFTFloat Plane Design Theory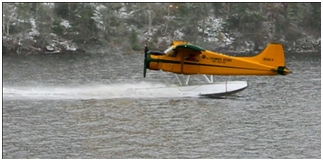
|
It's very important that the builder spend the time to get all the correct setup measurements and positioning. Otherwise the aircraft will not only have an unconventional appearance, it will probably be difficult and dangerous, if not impossible to fly. |
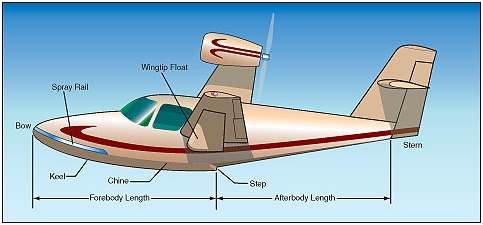 |
|
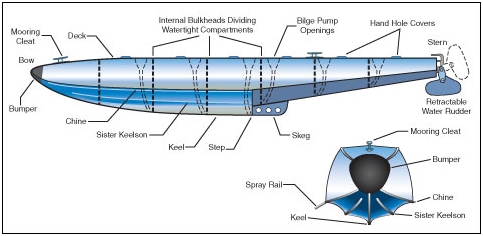 |
|
The Step |
|
 |
|
Angle of attack - floatsThe angle of attack of the floats must be such, that the floats present the least frontal area in flight. The float design helps provide lift in flight.The float datum line is along the flat top of the floats. In addition, during landing and takeoff there is a wing incidence relationship to the planning level of the floats. The floats must be between 2° to 4° positive when the aircraft is on the step during takeoff. If it is too little, the plane will not take off. If it is too much, the plane may take off too soon and stall. A float with too much angle will dig in, while, an insufficient angle will prevent the float from rotating for the lift off. The floats are mounted 2° -3° negative to the wing chord datum line (the line through the centre of the leading edge to the center of the trailing edge. A successful takeoff depends on getting the static angle correct and the step in the right place. |
|
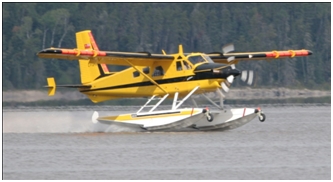 |
As the aircraft increases speed on take-off, the float rides up onto the step and suction is eliminated. |
Float SizeThe floats must protrude a distance of 1/3 to 1/2 the diameter of the propeller beyond the propeller. This will ensure, that the nose of the float, will not submerge when the throttle is applied. |
|
Propeller Clearance above FloatInadequate clearance between the tip of the propeller and the water will result in decreased RPMs every time the propeller strikes a wave, and/or an engine out, when water enters the carburetor due to the water being sucked up in the propeller vortex. The differential between the top of the float datum and the bottom of the propeller arch is determined by the buoyancy of the float (distance between water level and the top of the float). Naturally, the scale of the aircraft is a factor. The distance for a full scale Cessna 185 is 16 inches, for a Beaver 12 inches, a Beech 18 10 inches, a Cub 10 inches and a Otter 2 inches. |
|
Propeller SizeFloat aircraft require brute hauling power, rather than top speed. Dropping the prop one pitch size and increasing the diameter by one size will improve the take off performance. Never use wooden propellers when flying off water. They will break apart when they strike the water. |
|
Float SeparationThe distance from centreline to centreline (float track) of most full scale aircraft is 20% of the wing span. However, a distance of up to 25% of aircraft wingspan will provide far greater stability for R/C aircraft when taxing in light chop. Spreader bars and boxing wires are used to hold the floats in position. |
|
Acquiring FloatsPrebuilt plastic or fibreglass floats, kits that one can build from balsa and light ply, as well as foam core that can be covered with balsa sheeting and finished in fibreglass, film, epoxy finishing and paint can be purchased from a model supplier |
|
Mounting Gear for the FloatsThe existing wheeled landing gear can be adapted to the floats or it can be removed entirely a totally new mount created. It all depends on how scale like the builder wants their aircraft to look. If the landing gear is retained nylon nose wheel steering blocks can be used as quick mounts on the floats so that the switch back and forth between floats and wheels is quite easily. |
|
 |
Check out pictures of float aircraft at a hanger near you, in flying magazines and on the web for potential construction designs. Your fellow club members also have lots of good ideas. |
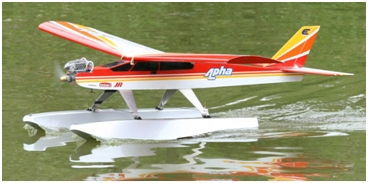 |
Many times the simplest approach is the best. If you keep the existing landing gear, you will have to insert some hard points in the rear bottom of the fuselage at a point about half the chord width behind the trailing edge. These hard points will anchor a rear landing gear support that might be a bit lighter, but similar to the front gear. |
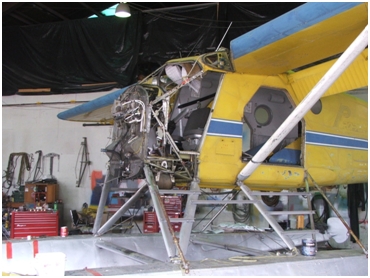 |
If you are going to strip off the landing gear, then you will need additional hard points front and rear and a solid support geometry to support the floats that does not twist or bend. Hard points on a full scale Beaver. |
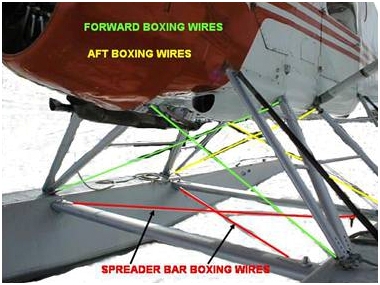 |
Full size Beaver aircraft boxing wire placement Strut boxing wires, spreader bar boxing wires |
Water Rudders |
|
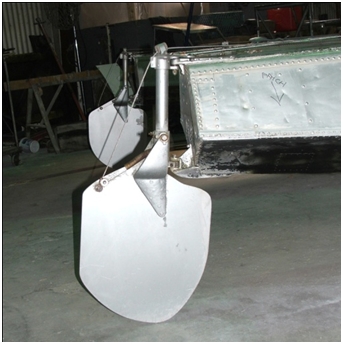 |
Water rudders work in harmony with the air rudder of the aircraft. The rudders must move in full deflection both right and left. Two rudders are much better than one rudder. The rudder spade surface area must be large enough to turn the aircraft at low taxi speeds or in strong winds. The Ernst plastic rudders in 40 and 60 size are very well made. Alternately, you can easily make your own out of thin metal. Rudders must be able to swing up when they reach the beach or strike an object in the water to prevent damage to the servos from counteracting stress. Some modellers replicate the full scale feature of being able to lift the rudders remotely prior to takeoff and putting them into the down position after landing. Thus, the water rudders will have any steering effect or drag on the takeoff run. |
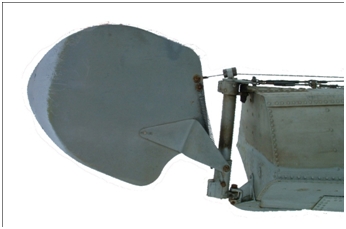 |
Pictured to the left are full scale Beaver water rudders (21 inch deep X 17 inch wide). |
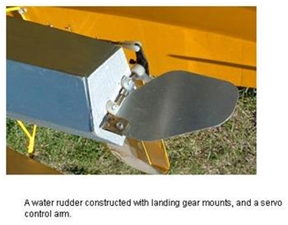
| Pictured below are some examples of construction techniques of various RC modellers. | |
 |
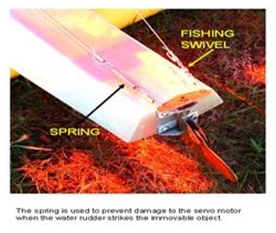 |
Flying Boat Rudders and Multi-Engine Float AircraftThe majority of full scale flying boats and multi-engine float aircraft i.e. Twin Otter do-not have water rudders. Aero-modellers install water rudders on their aircraft because they do not have separate power controls for each engine on a twin for changing direction when taxing. Thus a single water rudder at a minimum is normally installed on a multi engine float aircraft. |
|
Steering - Tiller Bars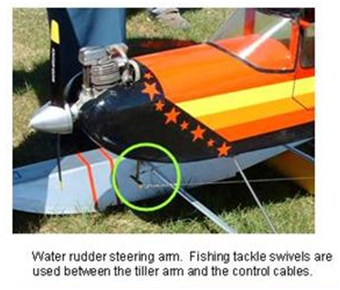 |
|
Protecting the bottom of the floatsThe bottoms of seaplanes and floats are very susceptible to hanger rash or damage, in particular if the bottom is covered in Mylar or plastic coatings. Placing an outdoor carpet at the water's edge of the launch and recovery area, at the start up area, and on the starting table, will greatly reduce abrasion damage. Transporting the aircraft in hard foam cradles or on soft foam will eliminate the transport damage. |
|
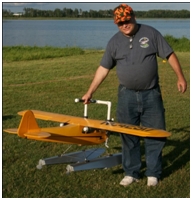 |
A neat invention for carrying a float aircraft. |
Splash RailsSplash rails are used to prevent small droplets of water from striking the leading edge of the propeller which can be operating at near super-sonic speeds. The contact force between the droplet and the blade can be so great, as to pit and damage the propeller. The splash rail on the full size Beaver is 4" deep by 60" long. Some splash rails start immediately aft of the nose bumper while others start 3" behind the float nose bumper.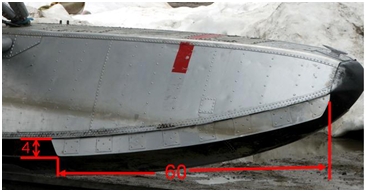 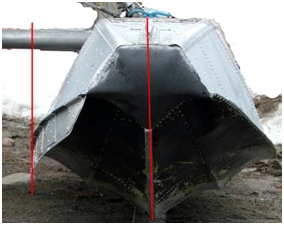 The trailing edge of the splash rail must extend aft of the trailing edge of the propeller arc. The splash rail is attached so that it is parallel to the centerline of the float. The splash rail is not a continuation of the angle of the side of the float. |
|
Aircraft Ventral FinsThe large side area of the float profile can cause weather-veining and make the aircraft difficult to turn in even slight winds. The problem is amplified on short coupled aircraft such as a Beaver. All float installations reduce stability of an aircraft in yaw by adding substantially to vertical surface area forward of the vertical axis of rotation. The ventral fin is used to offset the problems caused by the additional surface area of the floats.The tail area is inadequate and a ventral fin will need to be added if the aircraft will not turn nose into the wind after taxing downwind at a reduced idle. |
|
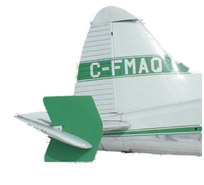 |
There are two types of Ventral fins. The type that are mounted on the tail-plane are called finlets. |
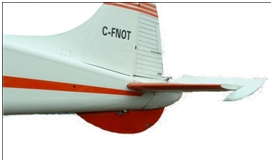 |
The type mounted under the tail plane on the fuselage is referred to as a sub- fin. |
Flying Tips |
|
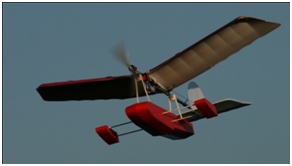 |
Pilots know that careful planning and preparation is the foundation for a successful flight. Think of yourself as a sailor and a flyer when flying a floatplane. Once a seaplane is in the water, it's at the mercy of the wind and current. It's important to get going quickly so the plane doesn't drift into trouble. Watch the wind direction. Learn from the mistakes of others. Asking for advice doesn't show your ignorance. Not asking does. Just when you think you know everything, is when you are about to learn another valuable lesson. Observe where the wind is coming from, its strength, where the water rudders will lose their effectiveness and when the aircraft will weathercock. |
Pre-flight inspectionCheck the general condition of the float undercarriage.Check for water (slosh test) in the float compartments. Check all cables and pulleys. Check the water rudder (freedom of movement left to right in relation to aircraft rudder, and up and down). Check all lift struts and spreader bars. |
|
The take off run
|
|
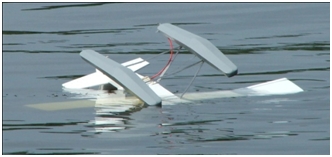
Dead Engine - SailingA dead engine on the water creates more challenges than a dead engine on a runway. The aircraft becomes a sailboat on the water and moves at the pleasure of the prevailing wind. The pilot has to stay on top of the transmitter controls. Keep the aircraft pointed into the wind with the rudders. Watch for crosswinds. Use the aileron to keep the wing down on the side of the prevailing winds. This is extremely important on high wing aircraft. Both low and high wing aircraft can be flipped over due to inattention. |
|
Waterproofing the Aircraft Components |
|
 |
|
Recovering Aircraft |
|
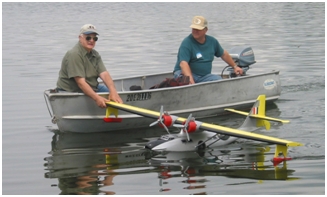 |
A navy or recovery boat is required at every float flying site. The boat must be equipped with all the mandatory safety equipment as legally specified. In addition, there must be a licensed boat operator. One must always be aware of the dangers of hypothermia when operating on cold spring lakes and rivers in the event that the boat/canoe rolls over. Be extremely cautious when retrieving an electric powered aircraft. The motor can come to life when the aircraft is pulled out of the water. Members of a retrieval team narrowly avoided severe cuts when that happen. The transmitter throttle could be still set a full power, or the aircraft powers up when the transmitter is turned off. |
Drying Out |
|
| If possible, transport an aircraft back to the beach that was turned upside down in the wing down position. Turning the aircraft upright will ensure that the entire inside will be wet instead of only a portion of the aircraft. The servos are usually in the bottom portion of an aircraft. The engine will have ingested water and the piston will be in hydraulic lock. Remove the glow plug. Make sure all the water is out of the muffler. Shake the airplane to make sure the clunk is down. Turn over the engine by hand and then with a starter. Replace the glow plug and start engine immediately. Run the engine until it is good and hot. The oil in the fuel will lubricate the bearings and prevent rust from forming. A wet receiver must be air dried. Take the electronic board out of its shell and let it all sit in the sun. Receivers usually work just fine after they are dried. Salt water, on the other hand could be a different story. |
|
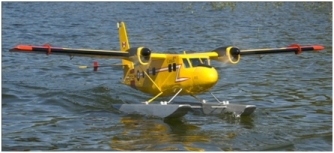
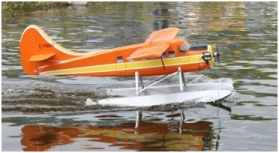
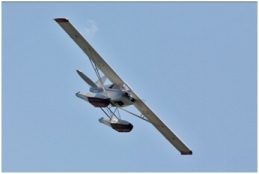
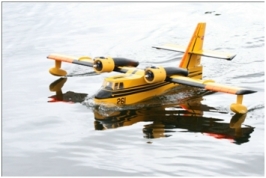
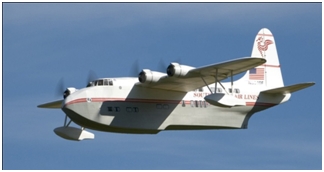
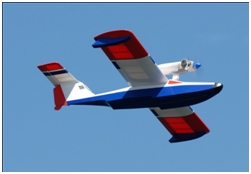
Pictures of some aircraft you might want to build |
|
 |
 |
 |
 |
 |
 |
A few sources of kits and plansLarge electric flying boats Ivan PettigrewFloats design by Wendell Hostetler Balsa USA 1/3 scale Edo floats Flying boats and floats by RCM plans Floats by Sea Commander Float kits Great Planes Great Planes offers a .20 .40, and .60 size float kit. Available at you hobby shop |
|